Monday, December 31, 2012

Beans, Beans, the Musical... Uh, Fruit?

I've been quite clear before; oatmeal is my soulmate.  Tea and rice are also staples.  However, another Godsend that should be discussed is the inexpensive, glorious legume.

Chickpeas for snacks and hummus; black beans for tacos; northern, kidney, and blackeye for soups; pinto for refried beans, lentils for everything...

It is my opinion that buying the dry ones and cooking them is better than the canned beans.  It is adventurous! And I can get the consistency I desire - softer, harder, infused with certain flavors.

My basic method for everything except the lentils is to soak in a bowl overnight, drain and give them a good rinse, then toss them in a slow cooker with plenty of water and/or broth.  Set it on a low setting and check back in 6 to 8 hours, adding spices or herbs as needed throughout the cooking stages.

soaking black beans


Special added bonus: save the water that the beans soaked in and give it to your plants!  When the beans soak, some of their nutrients (including nitrogen) is lost to the water.  Pouring that water on your plants gives them a bit of free fertilizer.

For the New Year

For hours, I've been pondering resolutions for the New Year.  What have I learned since this time last year? How have my values changed?

Because I'm someone who so longs to try new things and learn new skills, I'm finding that I own a lot of stuff.  An array of crochet needles, tea assortments, sewing materials and tools, gardening supplies, art supplies, cooking utensils, dried foods, plants, ... and on, and on.

And I keep acquiring more in a vain attempt to simplify my life.  Purchase, purchase, purchase.

Which leads me to my single, simple goal for this upcoming year - find ways to make do with what I already have.  Sell what I don't need; borrow rather than buy when I can.  Cut my possessions back to necessities so that I might find peace.

Friday, December 28, 2012

Gerb's BEST tuna salad!

I'm not much for seafood.  It's healthy, yes, but I live in the most interior portion of the U.S.  There IS no natural water.  There ARE no fresh water fish (or even just fresh fish, for that matter).  So the only seafood I've ever known has been massacred by means of canning, freezing, mass producing in fish farms, frying, etc.

So when I accidentally made a good tuna salad this morning, I surprised myself.  Anyway, this is simple, inexpensive, and quite healthy.  Enough talk!
Goes great with matcha!


Ingredients:

  • 1/2 c short grain brown rice (can use any rice, really, I just like the texture the short brown gives to the salad)
  • 1 can of tuna (5 oz; I used albacore because I can... get it??! CAN! )
  • Some tidbits of flavor in the form of green onion (about two sprigs of the green parts), garlic (about 2 or 3 cloves, depending on your tastes), ginger (about 2 tsp, grated; hell, I went wild and shredded up a HUGE chunk and it was tasty), and finally, a few leaves of lemon basil if you have it (or some thai lemon grass, or possibly even some real lemon zest).
  • Some sesame seed oil for toasting
  • Some carrot for garnish
  • A spoon of mayonnaise (I tried to avoid it, but the stuff was just so dry without it.  I suppose you could use yogurt if that's your thing)
Never said I was a good photographer.

1. Cook rice according to package.  (I cooked mine in the microwave in the rice cooker because I'm lazy.  Took 27 minutes total.)
2. When rice is still cooking, add sesame oil (about 1-2 tsp) to small sauce pan, and put at medium heat.  Add minced garlic, shredded ginger, and chopped green onion to oil for about 45 seconds until fragrant.  Just try not to let the garlic brown.  Stir or swirl it periodically during this process.
3. When seasoning are fragrant, add a smidge (like 1/8 c) of cool water to the sauce pan. Add drained tuna.  Continue to saute for a few moments.  Add a pinch of sea salt if desired.  Turn down temperature to low.
4. Add shredded or finely chopped lemon basil.
5. When rice is done, add it to tuna mixture, and stir.  Add mayo and stir again.
6. Stick your chopped carrot next to your salad.  It adds a nice fresh crunch.  Serve plain or on bread.

Friday, December 21, 2012

The Day

Today.  The winter solstice.  The beginning of the coldest season.  The shortest day of the year (which, for my area is exactly 10h, 33mm of visible light).  And what could have been the last day of life on the Earth.

Of course, it wasn't.  Or isn't. Yet.  And I suppose, truly, any day could be the last day.  For any or all of us.  If the idealists and existentialists are correct, then the day that I die will be the last day for all things, right?

As I rode my bike to work, my mind absorbed the environment around me.  The low-lying angle of the morning sun; the uncannily warm temperatures for the first day of winter (50 degrees!); the smells that one would associate with spring...

And I smiled.  Even if the world did end tonight - I would be at peace.  I'm young, but I have had the opportunity to experience life.

I'm a do-er.  I actively try to learn new things, to find new adventures.  Daylight is precious to me.  So the shortest day of the year is a blissful occasion.  It means that things are progressing uphill for 6 months.  Each passing day will mark a few more moments of brightness; one day closer to summer.  I can't wait to have my garden back!

The damp dirt road gives way beneath my bike tires as I pedal along.  The mildly cool air swirls around us, and on the darkest twenty-four hour span of 2012, I find contentment and hope.

Monday, December 17, 2012

Mini Post 2

Instead of my usual cup of coffee with breakfast this morning, I substituted a hot cup of black tea.  It was a refreshing change.  That in conjunction with an orange and a handful of almonds set me in the proper frame of mind for a peaceful day.

Kitchen "appliances" that feel irreplaceable to me:

  1. Slow Cooker: there's always something brewing in it, so it is almost always on.  Beans, oatmeal, chickpeas, broth, cider, applesauce, and pot roast are the most common delicacies. 
  2. Tea Kettle: sure, I have a microwave, and I could easily nuke some water for tea; but do I want to do that? Do I want to miss out on the process?  And how wonderful is it to come back to the kettle 45 minutes later and still have piping hot water waiting to become something!
  3. Food processor: the readers who have been following know that I've been getting by without the aid of some fancy-schmancy food processor, but I haven't been happy about it.  Kitchen simplicity is about making the things you already have work... you know, "making do."  But I counter-argue that this processor, in its own simplicity, can whip up hummus so quickly that I have more time to spend with the family, which has its own unspeakable benefit.
  4. Coffee grinder/ coffee pot: self explanatory.
  5. Popcorn popper: surprising to find this on the list, perhaps, but I've found many more things that I can do with my pooper popper compliments of the interwebs.  Really? Roasting coffee beans? Great idea!  Not to mention that it is much more healthy and cost efficient to make some quick popcorn rather than microwave those packets of mystery orange-yellow powder and slightly stale kernels that an old man with a beard markets to the general public.
  6. Finally, I mention the oven/stove.  Sure, I take them for granted.  It happens.

That is all for now.  Have a blissfully mellow day!

Sunday, December 9, 2012

Mini Post


I whipped up some homemade tomato sauce to put on the pasta I cooked for dinner.  Here's the link to the recipe I used.  It is amazing, and cooks up very quickly.  Very simple - exactly what I was needing.


Five Minute Tomato Sauce
From www.101cookbooks.com

Thursday, December 6, 2012

What's For Breakfast?

In recent years, I was an early riser.  From 5 am until 7 am, it was "me" time.  I could do things that I wanted to do unimpeded.  Yoga, housecleaning, reading... anything I wanted to do.  And then at 7, I would begin my regular morning routine.

Now, I'm lucky to be awake by 8 (which is when I'm supposed to be at work).  Luckily, I've got a pretty lenient schedule, and can show up whenever I so please, as long as I get all of my required work done by the end of the day.  So what changed?  I was happy being awake before the sun came up; why would I alter that schedule?

Two words: second job.  And it's a late night shift, two or three nights per week.  And it involves a lot of running around and lifting heavy things.  So after one year of that, it finally has caught up to me.  I can no longer work a solid 16 hours and then be bright-eyed after a mere 5 hours of sleep.

What to eat for breakfast when I'm running late? When there's no time for a bowl of whole grain oatmeal to simmer on the stove, I go for vegetables.  Generally, I avoid the processed stuff like Poptarts, doughnuts, cinnamon rolls, cold cereals.  They're expensive, and they are far too sweet for my tastes in the morning.  I like black, unadulterated coffee, and bitter things like arugula, kale, chives, and sourdough.  

This morning: a bag of fresh uncooked spinach, a few florets of broccoli, and a flat bread.

What do you eat when it's grab-n-go?

Sunday, December 2, 2012

Green out of the Gray

It will be officially winter soon.  Though it has been a fairly mild winter here, it has still been cold enough to effectively kill off all signs of vegetation in my gardens.  My perennials look sad; my herb garden is hibernating for the time being (but at least I can still use the thyme!); the grass is curled and brown.  But...

Inside the house there is a great reprieve.  My mother-in-law sent me a beautiful pot of indoor houseplants she started from her own larger plants (she's got a green thumb that I envy so).  And I followed some sage advice to go ahead and grow some green onions inside.

Many readers are probably aware that you can grow green onions from the bulbs you buy at the grocery store.  But for those of you who were not aware of this, here's how it works:

Step 1) Next time you're at the store, pick up one of those lil' bunches of green onions.  They are hella cheap - I've seen them anywhere from $0.20 up to $0.89.  For this project, I recommend the variety with the smaller bulbs (the lil white part with the roots) rather than the larger ones, simply because they take up less space and require a smaller pot.

Step 2)  When you get home, cut the green tops off - leave the bulb intact plus an extra 1/2 to 1" of growth above the bulb.  The overall length of the part you're saving will be about an inch to an inch and a half long.

Step 3)  Make something fancy and delicious with your green onions.  Chop 'em up and put them on a chili cheese dog, or on a baked potato, or in some kimchi (see previous entry!).

Step 4) Plant bulbs in soil in a pot.  I recommend using soil that is designed for potted plants - don't just rush out and grab some silt from your driveway and expect this to work.  The pot (or I guess I should say vessel, because you can use anything - an old yogurt container with some drainage holes in the bottom, a fibrous old egg carton, or some newspaper that's been rolled up into a pot work too!) doesn't need to be much deeper than the height of your onion bulb chunk.  An extra inch or two will be more than sufficient.  Give each bulb some space so that they aren't overcrowded.


Step 5) Periodically water the bulbs.

Step 6) Cut off onion greens as needed for your culinary desires.

I love that it adds some greenery to the house in such a drab season; it also helps ward off the occasional stray fruit fly, and it means that I'll always have some fresh onion on hand!

What's In the Fridge


These items are two of my favorite things to keep in the refrigerator these days.  First is the concoction in the jar on the right.  It's a simplistic mix of slices lemons and honey that have been stored in the jar for several days to "brew".  Once the lemons release their juice into the honey, the delightful syrup can be added to a mug, and then I pour boiling water over it and allow it to steep for five or more minutes.  It is the perfect soothing beverage for cold winter mornings!  And, if you're feeling adventurous, you can add any combination of fresh ginger, whole cinnamon sticks, clove, or anything else that suits your fancy.

Delightful!

The second jar is a quick kimchi (not the authentic Korean "bury it in the ground" kind).  I found the recipe in (you probably guessed it) Nourishing Traditions.  It is a Korean sauerkraut.  Basically, you shred up some carrots and ginger, add sliced green onion, minced garlic cloves, crushed red peppers, and chopped green or red cabbage.  Pound the whole batch of vegetables relentlessly on your counter (I use a meat hammer and really take out some frustration!) to get them to release their natural juices.  Add copious amounts of salt (Brittany Gray or Celtic is recommended, for the mineral content), and mix together more.  Then you stuff it into a wide mouth Mason jar and pound it down with a dowel, the handle of a spatula, or even your hand.  Just keep mashing it into the container until all the juices from the vegetables rise to the top of the jar (all of the ingredients need to be fully submerged in the brine or mold will grow on them).

Then you cover the jar with a lid (but don't worry about it being super tight - the fermentation process will release gas and cause a huge pressure build-up in the jar).  You can even cover it with a dishcloth or other breathable material in lieu of a lid.  You leave it on your countertop at room temperature for 3 to 7 days.  It takes longer if your kitchen is a colder temperature; quicker if it is warm.  Periodically check to make sure that all the ingredients are still submerged in the brine - if you don't have enough brine to submerge it fully, then you can add some water as necessary (use pure water, not tap water - the chlorine can greatly hinder the fermentation process and can lead to disastrous results!).

After several days, it will start to taste and smell like vinegar (if you've done it correctly).  Some people recommend using a vegetable fermenting starter culture; some people use whey (as long as it has the active bacteria in it).  Some recommend avoiding the salt altogether, and simply use the culture instead.

Okay, so by now you may be thinking, "Seriously, Doody? You just leave that sit for days?  And you expect me to eat  that?!  Will I die?"  Truth is, yes there is some chance of contamination - the mixture can grow mold (which is harmless, and can simply be skimmed off of the top and thrown away or put in your compost heap).  There is also a chance of the ever-dreaded botulism if your fermentation doesn't work properly.

Here's how it all works:  when you add salt to the vegetables, the salt in the brine temporarily protects the jar-o-goodness from any bacteria.  It prevents the bacteria from developing for a short while.  That buys you enough time for the vegetables and brine to ferment.  Once the fermentation process has begun, "good" bacteria (see: lacto-fermentation), form in the brine and fight off any "bad" bacteria that could try to develop in the food.  

When you eat a modern jar of pickles, you're getting some cucumber slices that have been treated with vinegar to prevent them from going bad while the slices ferment and become squishy.  However, you lose valuable nutrients as well as the beneficial bacteria you could have gained in a true fermentation process.  The process of fermenting the kimchi makes a sort of vinegar on its own, and actually boosts the nutritional content of the vegetables.  That's right - your body will actually be able to get, retain, and use more vitamins from this fermentation process than what was originally in a raw carrot or raw cabbage (which are pretty healthy to begin with).

You will determine how long you want your kimchi to ferment.  The longer it sits out (up to 7 days, typically), the more vinegary it will taste.  If you want it to have a stronger flavor, you let it sit out for 12 hours, and taste it again.  If you taste it and it seems like it is getting too pungent for your liking, then you just put it in the fridge to stop the process.

The beauty of it is that this jar (or jars, if you make a large batch like I do) of kimchi will keep in the fridge for a really long time (we're talking like up to 6 months ish).  It's used like a sauerkraut - can serve it on crackers, with bread, meat, on bratwurst, or can even mix it with other vegetables for a salad.  The good bacteria in it will help your intestines (the same way yogurt does), and the brine will also help your body break down other foods better.

So can this honestly be a dangerous food to make?  Yes.  Like I said, if the fermentation doesn't occur properly, the conditions will be ripe for molds and bacteria like botulism to grow.  But I've not had any problems with it thus far, and the deliciousness makes this a risk I'm willing to take!

Feel free to peruse the internets for more information on the fermentation process and for more fermenting recipes!  If you find something amazing, you can most certainly post it in the comments section below - I'd be glad to check it out!  

Thanks for reading!

Thursday, November 29, 2012

New subject.

Since the last several entries have been food-related, I wanted to mix it up a bit.  So this entry is about... 

COMPOSTING!!!

It's messy, and stinky at times, but it is nature's way of turning the dead, unused, or rotten plantforms back into beneficial components.  Here's what my year-round compost heap looks like:


The big trash bag next to it was one of six bags of leaves I'd gotten from neighbors.  I am actually in the process of making a second cage next to the first one to put all of those leaves in.  Often times, overly finicky gardeners will spend hundreds and hundreds of dollars on composting equipment.

Unnecessary.

Mine's working fine (although it is a tiny bit more work than the bins with a handle that you just turn to aerate it all) and it was cheap to make ($4.00 per bin).  It will take a bit longer for the waste to transform into compost than some rigs, but again... $4.00 < $350.00.

Step 1: Buy, salvage, or borrow something to make the cage out of.  I bought bug screen that was designed to keep critters out of people's radiators on cars.  You can use hog panels, chicken wire, or any other wide range of materials.  The stouter, the better.  But it also helps that it is made of something that can breathe.  If you decide to use something like an old trash can or a 55 gallon drum, I highly recommend that you drill many holes in the sides of it so that the necessary air can circulate through your composting materials.

Step 2: Find a place for it.  You'll want it far away from your house and garage.  It has a tendency to attract bugs (there are natural remedies for that too), and can get smelly if you don't have a good ratio of green to brown, and the right amount of moisture.  

Step 3: Build it!  Simple enough, right?

Step 4: Load it up.  Fill it with table scraps (but keep anything fatty or sugary out of the bin - those things don't break down well, they'll make the heap even smellier, and it will attract more bugs and animals to your yard).  The stems from broccoli, moldy old bread, grass clippings, untreated wood (like twigs that fell off a tree into your yard), dead flowers, leaves, old newspaper (preferably those that have been printed with only black and white ink, and with ink that doesn't contain lead), coffee grounds....  there's TONS of stuff that can go out to the heap that would otherwise end up in a landfill.

Step 5 (this is the part where the work comes in): About once per week (or up to once per month if you're feeling lazy), go out, disassemble your rig, and use a hay fork to turn your pile up.  Just kinda stir it around.  Once it's all mixed up again, reassemble the ring and fill 'er back up again.

Step 6: If you live in an area that receives little moisture, you'll need to add some water to the heap every so often to keep it moist and working.  But don't overdo it.  If it gets too wet, the pile will get a really pungent strong odor to it.  If it gets too dry or if you don't turn it often enough, the insides of the pile will grow a white powdery mold.  If this happens, your pile won't decompose properly (or at all, for that matter).

By using this method, in 6 to 12 months, you'll have good, happy compost to work with.  There will be nutrient rich, dark colored matter in the middle of your pile (and throughout it) which you can then use to fertilize your plants and lawn.  And those three bananas that you forgot about on your counter for  two weeks didn't actually go to waste afterall!


Wednesday, November 28, 2012

Using Starter to Make Flatbreads

Needing a cheap meal? Great snack? Something that makes you feel like a hippy?  Look no further!

I had homemade hummus just a-lyin' around, and desired something amazing on which to devour it.  And there was that overabundance of sourdough starter lurking on my kitchen counter, so it just made sense...


So I took an estimated two cups of my starter, and mixed that with some flour and water.  How much flour and water?  I don't know! I don't have all of the answers!

But you basically follow the recipe in the previous post about making a loaf of bread from your starter.  You add approximately 2 to 4 cups of flour (wheat, white, whatever), some salt (1/2 to 3/4 tsp ish) and 1/2 to 1-1/2 cups of purified water to a bowl with your starter and hand mix (or if you're really special, you may opt to use the lil bread dough attachment on your fancy schmancy mixing machine, you lucky asshole).  So once it's all blended, check your consistency.  If the dough is still soggy acting (when you form a ball with it and place it in a bowl, does it immediately start to sag or "melt" down in the bowl?), add more flour to make it a bit more solid.  If the dough is too dry (is there still some dry flour in the bowl that you can't get to incorporate?  is the outside of the ball dry and floury looking?), add a bit more water and mix it some more.

Sit it in the bowl in a warmish place.  Cover it.  Let it sit for 12 hours.  Leave it alone.  Don't poke at it.  Don't cradle it in your arms while you dance to 80's music (tempting, I know).


When that is done, and you've had enough of Twisted Sister, Quiet Riot, and covers of "Footloose", grab your big ball -o- dough and divide it into 5 to 8 chunks (depending on how large or small you want your lil flat breads to be, and what the dough will allow you to do).  Get a rolling pin and a clean, flat surface, and roll it out until it's as thick as your Hooked on Phonics workbook.  Rude!  Okay, but it needs to be between 1/2" to 3/4" thick.  Too much thinner and it gets crispy and too chewy.  Too much thicker and you've lost that whole "flat bread" effect.

don't. do. this.

So, see that photo above?  It tasted great, but it was a failure.  Do what I say, not what I do.  See, my dough was too watery when I attempted this first round of bread.  So when I rolled it out and tried to put it on my preheated baking stone, it was sticky and stretchy, which made it a horrible mess.  I was in a hurry, so I just folded it over on itself, and over-floured the holy living shit out of my baking stone to keep the lil lump from sticking.  The outcome? It was too thick, so it is a bit dense, has an odd flavor in the middle, is over cooked at the edges, and has a powdery, unappealing dusting of raw flour on the outside.

But, you can kinda see what we're going for here.  I kept mine in a Ziploc bag with a paper towel (to absorb extra moisture), and I just nuked 'em in the microwave for 20 sec before consuming them (this made it warm and soft and oh so delicious).  I dipped mine in hummus, tried it with Kimchi, and melted butter over it.  There are many, many different ways to enjoy your flat bread.  Get creative.  Ooh, and they freeze well too, so you can stash some extras back for later.

Wednesday, November 21, 2012

"Recipe"

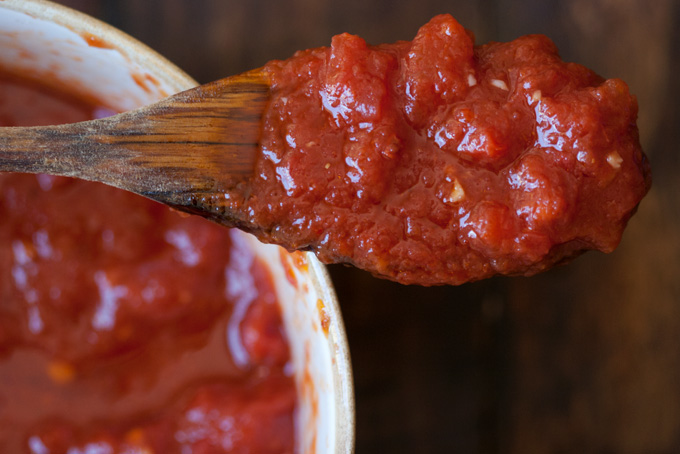
Homemade Sourdough Bread (made with no commercial yeast!)

Some of the basic structure of the making of this bread was derived from a recipe found in Nourishing Traditions, a wonderful book from the Weston A Price Foundation.  There's many reasons I adapted it -
  • whole wheat, for some reason, doesn't tend to pull in the yeast cultures as well as white bread; 
  • I didn't want to pay for and order in a sourdough culture; 
  • the bread tended to be very dry even before baking, and when it was done, it was even more so; 
  • the bread was also heavy, and the crust was so hard it was inedible.  
Then again, maybe I'm just bad at following directions.  ...  ...  ... I'm probably just bad at following directions.


So after browsing through many other sourdough recipes, this is what I've come up with:

To make a starter for your bread-
  Day 1: Mix 1/4 c. white bread flour with clean, filtered (chlorine-free) water.  If all you have is tap water, you can draw up a glass, and leave it sit on a countertop (covered with a cloth to keep wee flies out) for at least 24 hours to let the chlorine dissipate.  I can't tell you exactly how much water you will use (it ends up being somewhere around half of a cup).  Mix these two ingredients together in a glass container (I use a large Pyrex measuring bowl)  You want the mixture to be fairly soupy, but not a watered down mess.  It should stir up about like cooked oatmeal, I guess.
   Once you've got it thoroughly mixed (I use a fork to stir it and aerate it), cover your glass bowl/dish with a dishtowel or cheesecloth to keep out unwanted foreign objects.  Leave it sit in a safe place (a warm countertop in some sunshine is ideal).

  Day 1, part two: twelve hours after that first step, and once every twelve hours after that, you'll need to add another 1/2 c flour and some water (about 1/3-1/2 cup) to your starter.  Again, you'll want it to be damp and a bit soupy.  If you check on it and see a cloudy greasy liquid on the top (called "hooch"), then you added too much water last time.  That won't hurt your starter - just pour off that excess liquid and give the starter a good stirrin'.  If the outside crust of your dough starts to look crusty when you perform your routine 12-hour check, then you will need to add a smidge more water next time.  Always give the starter a good stir with a fork or bread whisk at these 12 hour intervals to get it some air!

  By Day 5-8 (depending on how warm your kitchen has been and how much air circulation you've had), the dough will start to smell yeasty.  You should notice bubbles forming in it, and it should be trying to rise up out of your glass container in between times.  This means it is almost a teenager, and it's time for it to move on to the next step in its breadly life!


If you notice that your bowl/container is getting crusty, just transfer the dough to a different container.  I switch my dough from one bowl to the next about every other day.

Also, once the starter dough is beginning to "yeastify," I begin adding whole wheat flour, rye flour, or spelt (or any combination of the three) to the dough instead of the white flour.


Got starter? Make bread!

Remove 1 to 2 cups of starter from your bowl.  Mix it in another container with 3-1/2 c. flour (white or whole wheat, or a mix of the two), 1/2 cup of pure water, and 2 tsp sea salt (I prefer celtic!).   Depending on how much wheat you've used in this whole process, you may need to use more water to get the consistency you want.  The dough won't rise much if it is too dry.

Mix well, and cover with a dishtowel.  Leave in a warm-ish place to rise for 12 hours.

MORE WAITING?!! Yes.  This part requires quite a bit of patience.  If you want fast bread, then get you some quick-acting commercial yeast packets and a recipe from Food Network.  This is traditional shit, yo.  Gotta nurture it a little bit.

After that period of 12 hours is up, you'll take the dough and fold it over on itself... do that TWO times.  Then leave it alone again.  In the bowl. Covered.  For ANOTHER 2 to 4 hours until it doubles up in size.  If you're not getting a good rise by this stage, then you either didn't let the starter yeastify long enough before attempting some dough, or you may have too dry of a mixture.  There's various reasons that it may not rise.  Not all hope is lost, but beware that a dough that doesn't rise much will lead to a dense, heavy bread.

After that 2-4 hour wait, it's time to get to work.  Get the dough out of your bowl and onto a clean countertop.  Be careful with it.  The more you bend or shape or kneed or tear your dough, the more the proteins in it break down and change the bread.  This isn't a Stretch Armstrong, kid.  Shape your dough on the counter.  Wanting a round loaf of bread?  Make it round.  Wanting to put it in a bread pan for a more traditional loaf?  Go ahead and do that.  Once it's the way you want it (sort of), leave it alone to rise one more time.

In the meantime, though, turn your oven on to 450° F, and get an old aluminum pie pan (one that doesn't have holes in it).  Fill pie pan with as much water as it can safely hold, and put this on the bottom rack of your oven while the oven is still warming up.

Get your baking stone, if that is what you're baking the bread on.  Dust it with cornstarch so the bread doesn't stick.  Put it in the oven too, so it can be warming up.  Get some welding gloves handy.  Really.  That baking stone will be SOOOO much hotter than a pan, so if this is your first time using a baking stone, use extra caution.  I honestly handle mine with high heat welding gloves, and even that isn't enough sometimes.

After the two hours is up, and you've gotten everything preheated, carefully slide your bread stone out and transfer your bread dough to that (trying to disturb it as little as possible).  Put 'er in the oven for about 45 min.  When it's thoroughly cooked, it'll make a hollow thud when you thump the bottom of it (unless your bread is mostly wheat/rye, or unless it didn't rise much in the earlier stages).


When it's done, let it cool on your bread rack.  Easy-peasy.  Now admire what you've created!  Assuming you already had running water in your house, some pan/stone to cook the bread on, and some table salt lying around, then all you've purchased for this project was some corn starch and some flour (and it was probably fairly inexpensive).

Now, what about the rest of that starter?  You can leave it out and continue making bread with it (remember to feed it once per day by adding 1/2 to 1 cup flour and more water), or you can put it in a container and put it in the fridge.  If you put it in the fridge, remember not to seal it TOO tightly in your container, because it will still build up some pressure from the yeasting process, and it could make a big mess in your fridge if it explodes.  You won't have to feed it every day when it is in the fridge, but you'll have to feed it about once a week to keep it "alive."  I forgot about one mason jar of starter for almost a month in the back of the fridge and it was black and oily and disgusting when I found it.

Monday, November 19, 2012

Makin' Cop-peehhhs!

Okay. No. I'm not making copies.  But I am making bread.  Homemade, lovingly nurtured sourdough.  It's a wheat/rye/white mix.  My first batch from months ago was all rye and came out all dry.  So I'm altering things a bit (which will be less healthful, since I'm trading some of the whole-grain goodness for the empty carbs and processing of white flour).  Hopefully this loaf of bread won't be heavier and harder than a cinderblock!  Photos and recipe to come!

Tuesday, November 6, 2012

Giving my Best Friend a makeover

Ah, mon cher ami.  Mi bicicleta.  When I was a wee tyke, my parents bought me a small banana seat Huffy.  It suited me until junior high school, when that ol' pink thing was just not cool.  So I purchased my first "big kid bike" with my very own hard-earned cash.  It was a 30 speed Huffy mountain bike.  Not top of the line.  Not intended to actually bike on a mountain.  But it got me around town during my pubescent pre-driver's license era.  And that's what mattered.

And then I became certified to operate an automobile, and the bike was parked in a dusty corner of the garage for many, many years.  It wasn't forgotten; there was still a level of maintenance handled (pun intended), but it was not ridden.  I had forgotten what an amazing instrument it was.

So after all that time, more than 15 years since its purchase, the bike was resurrected.  Cleaned up.  Pampered.  Adored.  My need for gasoline and car maintenance has dropped.  I have a deeper appreciation for still, calm, moderately warm mornings (because riding a bike to work in 35 mph straight line winds with a wind chill of 18 Fahrenheit isn't an experience to be ignored). 

This brings me to my newest project.  My cushioned seat cover fell apart from sunrot and age.  I've got tons of yarn, and moderate hook skillz, so rather than purchase a replacement, I set out to make my own.  

I perused the internets.  I found a very limited number of patterns and even fewer were free.  Not too many pictures of seat covers either.  Time to get creative.  

So I came up with this:


Nothing complicated.  Just a series of single crochets.  Chain 15 to 20 to start (hold it up to the back end of your seat and stretch the chain to find the right number for your size of seat).  Then go back and forth with a couple rows of sc.  Then do an increase row (I added an extra sc on each end of the row to give it a bit of bow).  Do another one or two rows of regular sc across.  Then begin to decrease stitches to the tip of the seat.  I had to keep holding up the work to my seat and comparing it.   As a rule of thumb, though, make your cover a bit smaller than the actual seat so that there isn't too much slack in it once you put it on.  

After the top was complete, I went around the outside edge of that piece with more rows of single crochets and threw in a few decreases here and there for good measure. This made the sides.  I used another piece of yarn and threaded it back and forth under the seat to attach the cover securely (it's not pretty, but no one will see it anyway... except you!)

I realize that there were better ways to accomplish this last step.  But this was pretty quick and required very little forethought.

Other notes: I used a rough, stiffer yarn (not stretchy or incredibly pliable).  It's that cheap Peaches n Creme cotton yarn you can find all over the place.  It took only half of a skein or so, so this was a very inexpensive project.  I also used a smaller hook (I chose an H since my yarn was nearly a sport weight, and because I wanted the stability of having more stitches per sq inch).


And TA-DA!   

Saturday, October 20, 2012

Introductions

Allow me to introduce myself.

Name's Doody.  Doody? Like Poop? No. No relation.  Or you can just call me Gerbil.  Or Gerb for short. But if your inner 6th grader finds the Doody thing hilarious, then I'll accept the first name basis too.  I've got a very specific set of skills, which  I will describe later.  I was Catholic born and raised, but I consider myself God-neutral at this point.  I'm not a vegan or a vegetarian, but I find a necessary simplicity inherent to vegetables and legumes and grains that soothes me.  I like technology, PBS, and oatmeal.  I enjoy board games, card games, sports, and World of Warcraft (it's my secret guilty pleasure if ever there were one).  Interior design and "decorations" are a waste of time and energy.  Utilitarian is my middle name.  I'd rather receive a blender and some socks for Christmas than anything pretty or fancy.  Socializing is great, but I choose not to drink because I don't find a purpose in it.  I prefer to ride my bike than to drive a car.  

I think you get the picture.


Skills I'm proud to have acquired: crocheting, basic knitting, gardening, cooking, basic automotive repair, the playing of various musical instruments

Skills I hope to acquire soon: sewing


A Hat
(that's not me in the picture)


 some lemon balm
great for tea, proudly grown from seed


little coriander


What is this "web log" of which you speak?

Time to catch up with humanity.  The 2000's was a time for everyone to have a blog.  Not now.  That's old hat.  But I'm behind the curve.  It's just my style.  I wait until after the throngs of boobs hit the buffet line, and  in my own time, I find food from the scraps left behind.  

Soon to come: a collection of things that I've found and things that I've done to make life simpler.  Not to be cool, not to be prettier or flashier than anyone else, not to be more lucrative or more healthy.  Just to get life back to basics.  To simplify emotions, traditions, livelihood.  And you're more than welcome to follow me on my way.