Captain's Log:
Today is Saturday. This past Thursday, I woke with a mild sore throat and lots of aches and pains throughout my body. 'No big deal,' I thought, so I made myself several cups of hot ginger and cinnamon tea to combat the possible oncoming cold. By mid-afternoon, I had a fever, and by 4:00 pm that fever had hit 102.4, which sounds more like an FM radio station than a body temperature.
I got tons of rest that evening, drank plenty of fluids - teas, lemon water - and gargled with salt water to help get rid of that sore throat. I was delirious with fever. My innerds felt so cold, but I could feel heat radiating from my face. When I woke Friday morning, I thought all was right in the world. My fever was gone, my sore throat was only barely noticeable, and I was very thirsty. I drank a quart of water and prepared to head into work.
And then the fever came back. And the sore throat got worse. And my legs felt like rubber, and weakness overtook my body. Back to bed.
85% of Friday was spent asleep and 95% was spent in bed. I managed to eat one decent meal. The fever broke by 4 pm, and I've been sweating profusely ever since. Drank water all day long. Gargled with salt water all evening long. It was during one of these gargling sessions that I glanced in the mirror and noticed the disgusting white patches all over my tonsils.
Shit. It's strep.
So here I am. On Saturday. Gargling with salt & cayenne pepper water every hour. Taking acetaminophen to mask the pain (a 6 out of 10 on the pain scale) of the sore throat. Drinking warm tea. Resting. Meditating.
And my new, simple lifestyle is having "a moment." First of all, most specialists will recommend antibiotics for Strep. Even if it doesn't cure the bacterial infection in me, it will prevent its transmission to others. But I don't want to subject my body to antibiotics. What truly is the greater good in this dilemma? Second of all, it is discouraging just to be sick at all. I eat healthy, nourishing foods. I get exercise and plenty of sunlight. I have reduced stress in my life, and I wash my hands frequently and properly. So, uh, wtf.
Any thoughts from the public?
Saturday, November 16, 2013

Tuesday, September 10, 2013
Hiatus!
Gardening season is winding down. Things have changed since the last post. Books have been read. Plants have been harvested. Philosophies have been pondered. My life of simplicity has been altered in crazy ways.
I'm fluttering between the eating regimens of the Weston Price crew (emphasis on quality fats; avoidance of grains) and a Vegan/Vegetarian ideal (emphasis on quality vegetation; avoidance of meat because of its impact environmentally). Either way, locally produced, organic meats/vegetables are not in abundance here. You eat commercial beef and poultry, or you eat an orange shipped in from Florida. Take your pick.
Sewing has halted: machine is broken. Repairs will be costly.
Garden produced crazy amounts of summer squash and peppers. Tomatoes were almost nonexistent due to the weather. Corn was obliterated from bugs. I've gotten several pumpkins already, which were carved, and seeds were saved. The herb garden is astounding, but that is another post altogether.
Things that are always in my hippie house:
1) Baking soda - it's the primary ingredient in all of my homemade goods. Deodorant, shampoo, detergent all require the power of baking soda, not to mention all of the regular cleaning jobs it tackles with ease.
2) Kefir
3) Beans - particularly lentils, chickpeas, black beans, and lima beans
4) Oats / Rice of some sort
5) Ginger & Lemons
6) Tea
Wild greens are always being foraged from the backyard to be added to meals. Dandelions, stork's bill, pigweed, shepherd's purse, lambsquarters, and purslane are very common in our area, and from what I've read, they contain more minerals and nutrients than greens raised commercially.
I'm fluttering between the eating regimens of the Weston Price crew (emphasis on quality fats; avoidance of grains) and a Vegan/Vegetarian ideal (emphasis on quality vegetation; avoidance of meat because of its impact environmentally). Either way, locally produced, organic meats/vegetables are not in abundance here. You eat commercial beef and poultry, or you eat an orange shipped in from Florida. Take your pick.
Sewing has halted: machine is broken. Repairs will be costly.
Garden produced crazy amounts of summer squash and peppers. Tomatoes were almost nonexistent due to the weather. Corn was obliterated from bugs. I've gotten several pumpkins already, which were carved, and seeds were saved. The herb garden is astounding, but that is another post altogether.
Things that are always in my hippie house:
1) Baking soda - it's the primary ingredient in all of my homemade goods. Deodorant, shampoo, detergent all require the power of baking soda, not to mention all of the regular cleaning jobs it tackles with ease.
2) Kefir
3) Beans - particularly lentils, chickpeas, black beans, and lima beans
4) Oats / Rice of some sort
5) Ginger & Lemons
6) Tea
Wild greens are always being foraged from the backyard to be added to meals. Dandelions, stork's bill, pigweed, shepherd's purse, lambsquarters, and purslane are very common in our area, and from what I've read, they contain more minerals and nutrients than greens raised commercially.
Wednesday, March 20, 2013
Fine 'n' Dandy, Lion
'Twas this time last year that I made the shocking discovery that *gasp* the vast majority of growing, leafy things in my lawn which I had spent hard-earned cash to eradicate in previous years were actually edible. In my area, the most common lawn weeds are dandelion, henbit, chickweed, wood sorrel, shepherd's purse, and possibly lamb's quarters. My fellow towns-folk all have bright green lawns right now - not because anything is growing yet, but because of the tell-tale dye used by commercially applied herbicides and pre-emergent designed to kill off those darned weeds.
We had stopped paying for those in years past - they are expensive, and we have a kid now. We don't want him out playing in a yard that reeks of chemicals. The weeds had, therefore, taken over the yard, making us the lonely eyesore about town. And then the shocking discovery occurred.
Sure, our grandparents all knew that you can eat dandelions. But no one ever bothered to inform lil ol me. But they are very bitter at times, so there are some tricks to making them palatable. First, catch them young. If you pick the young leaves (ones that have been hit by a light frost, but are still small and have no flowers on them), they will mostly just taste like typical leafy greens. If you pick them when they are older, you can saute them, and toss them with an oil (such as olive), and acid (I prefer lemon juice), and some salt (I choose sea salt and some feta cheese).
Voila! I prefer to eat them raw as much as possible. The greens are incredibly rich in nutrients. You can also eat the flowers (raw or cooked). You can harvest the massive root from the plant, dry it, and make a tea from it. You can steep the flowers in oils and make an ointment too. They are actually incredibly helpful.
We had stopped paying for those in years past - they are expensive, and we have a kid now. We don't want him out playing in a yard that reeks of chemicals. The weeds had, therefore, taken over the yard, making us the lonely eyesore about town. And then the shocking discovery occurred.
Sure, our grandparents all knew that you can eat dandelions. But no one ever bothered to inform lil ol me. But they are very bitter at times, so there are some tricks to making them palatable. First, catch them young. If you pick the young leaves (ones that have been hit by a light frost, but are still small and have no flowers on them), they will mostly just taste like typical leafy greens. If you pick them when they are older, you can saute them, and toss them with an oil (such as olive), and acid (I prefer lemon juice), and some salt (I choose sea salt and some feta cheese).
 |
| Dandelion Salad |
Voila! I prefer to eat them raw as much as possible. The greens are incredibly rich in nutrients. You can also eat the flowers (raw or cooked). You can harvest the massive root from the plant, dry it, and make a tea from it. You can steep the flowers in oils and make an ointment too. They are actually incredibly helpful.
I guess what it comes down to is this: I strongly encourage you to do some research. Henbit, lamb's quarters, wood sorrel, chickweed... all edible. And free. And healthy.
Of course, don't eat anything that could have possibly been treated with chemicals; don't eat vegetation that you haven't properly identified; don't eat things growing very near roadways.
The Gerb's Fresh Salad:
Ingredients-
about 1-1/2 c. freshly picked young dandelion leaves
about 2 tsp EVOO
1 tsp feta cheese
1 tbsp homemade kimchi
a squirt of lemon juice
a pinch of kosher salt (to taste)
a handful of pine nuts (or sesame seeds, or chia seeds, or sunflower seeds... whatever you feel like)
other mixed greens, if available (sorrel, kale, sprouts, mint, oakleaf, whatev.)
Thoroughly wash leaves to remove dirt and foreign objects. Spin in salad spinner or wrap with cheesecloth and spin it over your head like a helicopter blade (outside, dumbass, so you don't get water all over your kitchen). Then toss dried leaves with oil and juice. Add in everything else and combine until you feel satisfied. Dine.
Thursday, February 14, 2013
Just Taste the Parsley
This is one of those stories intended to inspire you to see the world in a new way. ... It probably won't work.
When I was a lil kid being raised in a small, Judeo-Christian community as a Roman Catholic, the Lenten season held a special bonus. Amidst the fasting and giving up fun things like chocolate or TV (with the hopes of being handsomely rewarded by our parents come Easter morning), there was a beacon of awesome hope - the ritual Seder Meal. There is a lot of deep symbolism in the reenactment of the Passover dinner. As a child, however, much of the religious meaning was lost to me. What I found fascinating was the sense of community.
It went down like this - the best baker in the town made matzo; a delightful Irish-born woman brought the most amazing cooked lamb; a guy who was renowned for his gardening prowess brought fresh parsley; and everyone else contributed with pot-luck dinner items and other symbolic necessities. Fifty to one hundred of us would gather in the tiny, cold, dimly-lit basement of our parish center, huddled together with small glasses of wine (grape juice for we little ones) and meager portions on our plates. We held scripts in our hands, and our parish priest led a mini-play. There was this indescribable spirit of adventure in the room - for us kids, we were basically eating foreign food (Unleavened bread and weird leafy greens? People actually eat those things?!). After the entire ceremony was done and we had lingered in meditative silence, we would bust out the real food and go to town devouring the rest of that delicious lamb. Good times.
I remember one specific event, though. It was the very first Seder we had ever planned; I was about six. The other kids were looking over the bits on our plate - horseradish, parsley, matzo, romaine, egg...
"Hey? What's this green stuff?!" I asked an adult while prodding at my sprig of parsley.
She explained, "Parsley. It's an herb. It is bitter tasting. We dip it in salt water to remind us...blah, blah, blah... but when it comes time, if you kids don't want to eat that part, you don't have to. I don't blame you either - parsley tastes awful."
In essence, an adult just told me, a child, 'this food is yucky - I don't like it; you won't either. Here's a "get-out-of-trying-something-new" card.'
But, defiant as I was, I tried the damn parsley anyway. And as a kid, I did think it tasted awful. But I ate the whole sprig. Mostly because someone told me I wouldn't like it.
It changed my life. As an adult, I love herbs. All herbs. They have my utmost respect for everything they do, and everything they stand for. One particular herb that I hold dear is the parsley. It still tastes the same as when I tried it that first time as a kid - but I appreciate it more. And every time I taste it, it takes me back to those memories of the Seder Meal, of all of us neighbors working together and getting along. We weren't jealous of each other, or scolding each others' children. It was a glorious festival being held in the middle of what felt like an ongoing 40-day-funeral.
All memories that may have been lost to the abyss of time if I hadn't decided to just taste the parsley.
When I was a lil kid being raised in a small, Judeo-Christian community as a Roman Catholic, the Lenten season held a special bonus. Amidst the fasting and giving up fun things like chocolate or TV (with the hopes of being handsomely rewarded by our parents come Easter morning), there was a beacon of awesome hope - the ritual Seder Meal. There is a lot of deep symbolism in the reenactment of the Passover dinner. As a child, however, much of the religious meaning was lost to me. What I found fascinating was the sense of community.
It went down like this - the best baker in the town made matzo; a delightful Irish-born woman brought the most amazing cooked lamb; a guy who was renowned for his gardening prowess brought fresh parsley; and everyone else contributed with pot-luck dinner items and other symbolic necessities. Fifty to one hundred of us would gather in the tiny, cold, dimly-lit basement of our parish center, huddled together with small glasses of wine (grape juice for we little ones) and meager portions on our plates. We held scripts in our hands, and our parish priest led a mini-play. There was this indescribable spirit of adventure in the room - for us kids, we were basically eating foreign food (Unleavened bread and weird leafy greens? People actually eat those things?!). After the entire ceremony was done and we had lingered in meditative silence, we would bust out the real food and go to town devouring the rest of that delicious lamb. Good times.
I remember one specific event, though. It was the very first Seder we had ever planned; I was about six. The other kids were looking over the bits on our plate - horseradish, parsley, matzo, romaine, egg...
"Hey? What's this green stuff?!" I asked an adult while prodding at my sprig of parsley.
She explained, "Parsley. It's an herb. It is bitter tasting. We dip it in salt water to remind us...blah, blah, blah... but when it comes time, if you kids don't want to eat that part, you don't have to. I don't blame you either - parsley tastes awful."
In essence, an adult just told me, a child, 'this food is yucky - I don't like it; you won't either. Here's a "get-out-of-trying-something-new" card.'
But, defiant as I was, I tried the damn parsley anyway. And as a kid, I did think it tasted awful. But I ate the whole sprig. Mostly because someone told me I wouldn't like it.
It changed my life. As an adult, I love herbs. All herbs. They have my utmost respect for everything they do, and everything they stand for. One particular herb that I hold dear is the parsley. It still tastes the same as when I tried it that first time as a kid - but I appreciate it more. And every time I taste it, it takes me back to those memories of the Seder Meal, of all of us neighbors working together and getting along. We weren't jealous of each other, or scolding each others' children. It was a glorious festival being held in the middle of what felt like an ongoing 40-day-funeral.
All memories that may have been lost to the abyss of time if I hadn't decided to just taste the parsley.
Tuesday, February 12, 2013
Say Cheese!
~~ Photographs Coming Soon! ~~
This last weekend's adventure was a brief soiree into the art of cheesemaking. Nothing fancy - yet. But I had a bunch of kefir that I needed to do something productive with, and I've got plans for whey, so cheese fit the bill.
Step 1: Take quart of kefir from fridge and set out to warm to room temp.
Step 2: Line colander with butter muslin and pour kefir in. Put bowl under colander to catch whey. Whey will need to be used within about 3 hours, so don't leave it out too long!
Step 3: Add cheese salt if you wish. It will help draw out some of the moisture and will add some flavor to your cheese.
Step 4: After a few hours, tie corners of cloth together and hang to drip for 16 hours, or until it is the consistency you want.
Step 5: Mix in any herbs or flavorings you desire. Eat or refrigerate.
This last weekend's adventure was a brief soiree into the art of cheesemaking. Nothing fancy - yet. But I had a bunch of kefir that I needed to do something productive with, and I've got plans for whey, so cheese fit the bill.
Step 1: Take quart of kefir from fridge and set out to warm to room temp.
Step 2: Line colander with butter muslin and pour kefir in. Put bowl under colander to catch whey. Whey will need to be used within about 3 hours, so don't leave it out too long!
Step 3: Add cheese salt if you wish. It will help draw out some of the moisture and will add some flavor to your cheese.
Step 4: After a few hours, tie corners of cloth together and hang to drip for 16 hours, or until it is the consistency you want.
Step 5: Mix in any herbs or flavorings you desire. Eat or refrigerate.
Sunday, February 3, 2013
Adventure
Ordered kefir grains from www.culturesforhealth.com. They came last Wednesday, and I began rejuvenating them immediately. Now (Sunday evening), I have my first batch of real kefir. It's good stuff.
If you're out of the loop, let me fill you in: kefir is fermented milk. Sounds gross?! Yes, at first. This drink is basically liquid yogurt. You buy "grains" that have been freeze-dried. You put them in a cup of milk on the counter in your kitchen - the little bacteria and yeasts that make up the "grains" feast on the lactose in the milk, breaking it down. You change out the milk periodically for fresh milk so that the bacteria have more deliciousness to eat and don't starve. Once they've fully awakened from their hibernated state, you get some properly fermented milk - a.k.a kefir.
The kefir tastes like plain yogurt - tangy, a bit sour (almost like buttermilk), and slightly effervescent. It can be used in recipes, drank plain or with flavors added, and can be made into cheese. It is loaded with healthy live bacteria cultures (the same way yogurt is) that can help boost your immunity and can help with "gut health".
And you just keep a-brewin'. Making cup after cup. Easy-peasy.
Except mine wasn't so easy to begin with - variances in room temperature can change your fermentation times. Mine was fermenting too fast, leaving me with curds and whey in my mason jar. So rather than simply straining the old milk through cheesecloth and putting the tiny little grains (and yes, some of them are smaller than rice to begin with) back into the jar, I was having to comb through a bowl of cottage cheese to find my minuscule grains. It would take 45 minutes to complete each milk change. But then I got smart and reduced my culturing time from 24 hours to 12, and things moved along more smoothly after that.
Live and learn.
If you're out of the loop, let me fill you in: kefir is fermented milk. Sounds gross?! Yes, at first. This drink is basically liquid yogurt. You buy "grains" that have been freeze-dried. You put them in a cup of milk on the counter in your kitchen - the little bacteria and yeasts that make up the "grains" feast on the lactose in the milk, breaking it down. You change out the milk periodically for fresh milk so that the bacteria have more deliciousness to eat and don't starve. Once they've fully awakened from their hibernated state, you get some properly fermented milk - a.k.a kefir.
The kefir tastes like plain yogurt - tangy, a bit sour (almost like buttermilk), and slightly effervescent. It can be used in recipes, drank plain or with flavors added, and can be made into cheese. It is loaded with healthy live bacteria cultures (the same way yogurt is) that can help boost your immunity and can help with "gut health".
And you just keep a-brewin'. Making cup after cup. Easy-peasy.
Except mine wasn't so easy to begin with - variances in room temperature can change your fermentation times. Mine was fermenting too fast, leaving me with curds and whey in my mason jar. So rather than simply straining the old milk through cheesecloth and putting the tiny little grains (and yes, some of them are smaller than rice to begin with) back into the jar, I was having to comb through a bowl of cottage cheese to find my minuscule grains. It would take 45 minutes to complete each milk change. But then I got smart and reduced my culturing time from 24 hours to 12, and things moved along more smoothly after that.
Live and learn.
Wednesday, January 30, 2013
Getting to the Heart of Hippiedom
First, I already don't buy new clothes. I've got one nice dress suit. I've got clothes that I wore in high school that I patch and repair and mend to make work. I get occasional hand-me-downs from relatives. And if this used-clothes stigma didn't make me enough of a dirty hippie, the rest of the post will convince you otherwise...
I've weened myself from "regularly scheduled" haircut appointments. Tired of paying for it. Especially since haircuts for style are a bit ridiculous anyway. But, now I'm also part of the no-'poo society. 'Poo, as in shampoo, not bowel movements.
I still shower, but I use basic, homemade soap. And now, I don't use shampoo to wash my hair. Shampoo is expensive, unnecessary, and loaded with synthetic shit. Instead, I make a solution of baking soda and water. I pour that into my hair, massage well, and rinse. Just before I get out of the shower, I mist my hair with a cider vinegar/water solution (as a conditioner), and I let it dry in my hair. Sometimes I just pour the vinegar over the hair and duck under the shower head briefly to wet it more before massaging it in. The vinegar doesn't smell once it is dry.
I'll admit, it's grimey at first. It's not the soft, sweet smelling, flowing locks of hair that I'm used to. But after a bit, the natural scalp oils neutralize and balance, and my hair started transforming into awesomeness. My natural wave came back, so I can let my hair air-dry and it looks nice without any styling. All the additives in the 'poo had been messing with its texture. So I'm all natural and lookin' good.
Which is disappointing, because I'm not the dirty hippie (by appearances) that my stereotype should indicate.
I've weened myself from "regularly scheduled" haircut appointments. Tired of paying for it. Especially since haircuts for style are a bit ridiculous anyway. But, now I'm also part of the no-'poo society. 'Poo, as in shampoo, not bowel movements.
I still shower, but I use basic, homemade soap. And now, I don't use shampoo to wash my hair. Shampoo is expensive, unnecessary, and loaded with synthetic shit. Instead, I make a solution of baking soda and water. I pour that into my hair, massage well, and rinse. Just before I get out of the shower, I mist my hair with a cider vinegar/water solution (as a conditioner), and I let it dry in my hair. Sometimes I just pour the vinegar over the hair and duck under the shower head briefly to wet it more before massaging it in. The vinegar doesn't smell once it is dry.
I'll admit, it's grimey at first. It's not the soft, sweet smelling, flowing locks of hair that I'm used to. But after a bit, the natural scalp oils neutralize and balance, and my hair started transforming into awesomeness. My natural wave came back, so I can let my hair air-dry and it looks nice without any styling. All the additives in the 'poo had been messing with its texture. So I'm all natural and lookin' good.
Which is disappointing, because I'm not the dirty hippie (by appearances) that my stereotype should indicate.
Thursday, January 24, 2013
Doing Some Reading
Here, in the cold dead of winter, when the days are short, and after having already planned out my upcoming garden down to the slightest detail, I've been reading. A lot. Inspiring topics; knowledge abounding. I've bought books (locally, of course), borrowed books, downloaded e-books from my State library. Here's my recent agenda:
- Animal, Vegetable, Miracle by Barbara Kingsolver
- Zeitoun
- Home Cheese Making: Recipes for 75 Homemade Cheeses
- Railroad Semantics
- Into the Wild
- Raw and Beyond
And, of course, I've been browsing other blogs about far off adventures, self sufficiency, secret government plots, knitting, and gardening.
Guess I'm just in a mood.
Wednesday, January 16, 2013
A Cold-Weather Update
I despise winter. Deep down, I understand that (at least for my location) winter is one part of the process that is life. Things grow, bear fruit, grow old, and die. Winter is integral to renewal. That philosophical inclination aside, I still hate winter.
In that spirit, I perked my mood by placing my first order (an archaic, old-timey "mail-in order", nonetheless!) for plant seeds. They are heirloom, organic, and are coming from a (relatively) local producer. With any luck (and large quantities of reading, studying, and learning throughout the rest of this off season), I will be growing fresh greens in no time. And then, this year, hopefully I can save seeds back for next year! Yay, free food!
I'll update you regarding my success (and, possibly, failure) as the year progresses.
On another front, I'm going to learn to make cheese. I did, and still do, the "sourdough" thing. I've tried making yogurt (less successfully); I've fermented vegetables. It was only a matter of time before this came up. So I'm looking for literature in the matter from my local library.
And you, dear readers, will be getting updates.
Be warned.
In that spirit, I perked my mood by placing my first order (an archaic, old-timey "mail-in order", nonetheless!) for plant seeds. They are heirloom, organic, and are coming from a (relatively) local producer. With any luck (and large quantities of reading, studying, and learning throughout the rest of this off season), I will be growing fresh greens in no time. And then, this year, hopefully I can save seeds back for next year! Yay, free food!
I'll update you regarding my success (and, possibly, failure) as the year progresses.
On another front, I'm going to learn to make cheese. I did, and still do, the "sourdough" thing. I've tried making yogurt (less successfully); I've fermented vegetables. It was only a matter of time before this came up. So I'm looking for literature in the matter from my local library.
And you, dear readers, will be getting updates.
Be warned.
Monday, December 31, 2012
Beans, Beans, the Musical... Uh, Fruit?
I've been quite clear before; oatmeal is my soulmate. Tea and rice are also staples. However, another Godsend that should be discussed is the inexpensive, glorious legume.
Chickpeas for snacks and hummus; black beans for tacos; northern, kidney, and blackeye for soups; pinto for refried beans, lentils for everything...
It is my opinion that buying the dry ones and cooking them is better than the canned beans. It is adventurous! And I can get the consistency I desire - softer, harder, infused with certain flavors.
My basic method for everything except the lentils is to soak in a bowl overnight, drain and give them a good rinse, then toss them in a slow cooker with plenty of water and/or broth. Set it on a low setting and check back in 6 to 8 hours, adding spices or herbs as needed throughout the cooking stages.
Special added bonus: save the water that the beans soaked in and give it to your plants! When the beans soak, some of their nutrients (including nitrogen) is lost to the water. Pouring that water on your plants gives them a bit of free fertilizer.
Chickpeas for snacks and hummus; black beans for tacos; northern, kidney, and blackeye for soups; pinto for refried beans, lentils for everything...
It is my opinion that buying the dry ones and cooking them is better than the canned beans. It is adventurous! And I can get the consistency I desire - softer, harder, infused with certain flavors.
My basic method for everything except the lentils is to soak in a bowl overnight, drain and give them a good rinse, then toss them in a slow cooker with plenty of water and/or broth. Set it on a low setting and check back in 6 to 8 hours, adding spices or herbs as needed throughout the cooking stages.
 |
| soaking black beans |
Special added bonus: save the water that the beans soaked in and give it to your plants! When the beans soak, some of their nutrients (including nitrogen) is lost to the water. Pouring that water on your plants gives them a bit of free fertilizer.
For the New Year
For hours, I've been pondering resolutions for the New Year. What have I learned since this time last year? How have my values changed?
Because I'm someone who so longs to try new things and learn new skills, I'm finding that I own a lot of stuff. An array of crochet needles, tea assortments, sewing materials and tools, gardening supplies, art supplies, cooking utensils, dried foods, plants, ... and on, and on.
And I keep acquiring more in a vain attempt to simplify my life. Purchase, purchase, purchase.
Which leads me to my single, simple goal for this upcoming year - find ways to make do with what I already have. Sell what I don't need; borrow rather than buy when I can. Cut my possessions back to necessities so that I might find peace.
Because I'm someone who so longs to try new things and learn new skills, I'm finding that I own a lot of stuff. An array of crochet needles, tea assortments, sewing materials and tools, gardening supplies, art supplies, cooking utensils, dried foods, plants, ... and on, and on.
And I keep acquiring more in a vain attempt to simplify my life. Purchase, purchase, purchase.
Which leads me to my single, simple goal for this upcoming year - find ways to make do with what I already have. Sell what I don't need; borrow rather than buy when I can. Cut my possessions back to necessities so that I might find peace.
Friday, December 28, 2012
Gerb's BEST tuna salad!
I'm not much for seafood. It's healthy, yes, but I live in the most interior portion of the U.S. There IS no natural water. There ARE no fresh water fish (or even just fresh fish, for that matter). So the only seafood I've ever known has been massacred by means of canning, freezing, mass producing in fish farms, frying, etc.
So when I accidentally made a good tuna salad this morning, I surprised myself. Anyway, this is simple, inexpensive, and quite healthy. Enough talk!
Ingredients:
So when I accidentally made a good tuna salad this morning, I surprised myself. Anyway, this is simple, inexpensive, and quite healthy. Enough talk!
 |
| Goes great with matcha! |
Ingredients:
- 1/2 c short grain brown rice (can use any rice, really, I just like the texture the short brown gives to the salad)
- 1 can of tuna (5 oz; I used albacore because I can... get it??! CAN! )
- Some tidbits of flavor in the form of green onion (about two sprigs of the green parts), garlic (about 2 or 3 cloves, depending on your tastes), ginger (about 2 tsp, grated; hell, I went wild and shredded up a HUGE chunk and it was tasty), and finally, a few leaves of lemon basil if you have it (or some thai lemon grass, or possibly even some real lemon zest).
- Some sesame seed oil for toasting
- Some carrot for garnish
- A spoon of mayonnaise (I tried to avoid it, but the stuff was just so dry without it. I suppose you could use yogurt if that's your thing)
 |
| Never said I was a good photographer. |
1. Cook rice according to package. (I cooked mine in the microwave in the rice cooker because I'm lazy. Took 27 minutes total.)
2. When rice is still cooking, add sesame oil (about 1-2 tsp) to small sauce pan, and put at medium heat. Add minced garlic, shredded ginger, and chopped green onion to oil for about 45 seconds until fragrant. Just try not to let the garlic brown. Stir or swirl it periodically during this process.
3. When seasoning are fragrant, add a smidge (like 1/8 c) of cool water to the sauce pan. Add drained tuna. Continue to saute for a few moments. Add a pinch of sea salt if desired. Turn down temperature to low.
4. Add shredded or finely chopped lemon basil.
5. When rice is done, add it to tuna mixture, and stir. Add mayo and stir again.
6. Stick your chopped carrot next to your salad. It adds a nice fresh crunch. Serve plain or on bread.
Friday, December 21, 2012
The Day
Today. The winter solstice. The beginning of the coldest season. The shortest day of the year (which, for my area is exactly 10h, 33mm of visible light). And what could have been the last day of life on the Earth.
Of course, it wasn't. Or isn't. Yet. And I suppose, truly, any day could be the last day. For any or all of us. If the idealists and existentialists are correct, then the day that I die will be the last day for all things, right?
As I rode my bike to work, my mind absorbed the environment around me. The low-lying angle of the morning sun; the uncannily warm temperatures for the first day of winter (50 degrees!); the smells that one would associate with spring...
And I smiled. Even if the world did end tonight - I would be at peace. I'm young, but I have had the opportunity to experience life.
I'm a do-er. I actively try to learn new things, to find new adventures. Daylight is precious to me. So the shortest day of the year is a blissful occasion. It means that things are progressing uphill for 6 months. Each passing day will mark a few more moments of brightness; one day closer to summer. I can't wait to have my garden back!
The damp dirt road gives way beneath my bike tires as I pedal along. The mildly cool air swirls around us, and on the darkest twenty-four hour span of 2012, I find contentment and hope.
Of course, it wasn't. Or isn't. Yet. And I suppose, truly, any day could be the last day. For any or all of us. If the idealists and existentialists are correct, then the day that I die will be the last day for all things, right?
As I rode my bike to work, my mind absorbed the environment around me. The low-lying angle of the morning sun; the uncannily warm temperatures for the first day of winter (50 degrees!); the smells that one would associate with spring...
And I smiled. Even if the world did end tonight - I would be at peace. I'm young, but I have had the opportunity to experience life.
I'm a do-er. I actively try to learn new things, to find new adventures. Daylight is precious to me. So the shortest day of the year is a blissful occasion. It means that things are progressing uphill for 6 months. Each passing day will mark a few more moments of brightness; one day closer to summer. I can't wait to have my garden back!
The damp dirt road gives way beneath my bike tires as I pedal along. The mildly cool air swirls around us, and on the darkest twenty-four hour span of 2012, I find contentment and hope.
Monday, December 17, 2012
Mini Post 2
Instead of my usual cup of coffee with breakfast this morning, I substituted a hot cup of black tea. It was a refreshing change. That in conjunction with an orange and a handful of almonds set me in the proper frame of mind for a peaceful day.
Kitchen "appliances" that feel irreplaceable to me:
Kitchen "appliances" that feel irreplaceable to me:
- Slow Cooker: there's always something brewing in it, so it is almost always on. Beans, oatmeal, chickpeas, broth, cider, applesauce, and pot roast are the most common delicacies.
- Tea Kettle: sure, I have a microwave, and I could easily nuke some water for tea; but do I want to do that? Do I want to miss out on the process? And how wonderful is it to come back to the kettle 45 minutes later and still have piping hot water waiting to become something!
- Food processor: the readers who have been following know that I've been getting by without the aid of some fancy-schmancy food processor, but I haven't been happy about it. Kitchen simplicity is about making the things you already have work... you know, "making do." But I counter-argue that this processor, in its own simplicity, can whip up hummus so quickly that I have more time to spend with the family, which has its own unspeakable benefit.
- Coffee grinder/ coffee pot: self explanatory.
- Popcorn popper: surprising to find this on the list, perhaps, but I've found many more things that I can do with my
pooperpopper compliments of the interwebs. Really? Roasting coffee beans? Great idea! Not to mention that it is much more healthy and cost efficient to make some quick popcorn rather than microwave those packets of mystery orange-yellow powder and slightly stale kernels that an old man with a beard markets to the general public. - Finally, I mention the oven/stove. Sure, I take them for granted. It happens.
That is all for now. Have a blissfully mellow day!
Sunday, December 9, 2012
Mini Post
I whipped up some homemade tomato sauce to put on the pasta I cooked for dinner. Here's the link to the recipe I used. It is amazing, and cooks up very quickly. Very simple - exactly what I was needing.
 |
| From www.101cookbooks.com |
Thursday, December 6, 2012
What's For Breakfast?
In recent years, I was an early riser. From 5 am until 7 am, it was "me" time. I could do things that I wanted to do unimpeded. Yoga, housecleaning, reading... anything I wanted to do. And then at 7, I would begin my regular morning routine.
Now, I'm lucky to be awake by 8 (which is when I'm supposed to be at work). Luckily, I've got a pretty lenient schedule, and can show up whenever I so please, as long as I get all of my required work done by the end of the day. So what changed? I was happy being awake before the sun came up; why would I alter that schedule?
Two words: second job. And it's a late night shift, two or three nights per week. And it involves a lot of running around and lifting heavy things. So after one year of that, it finally has caught up to me. I can no longer work a solid 16 hours and then be bright-eyed after a mere 5 hours of sleep.
What to eat for breakfast when I'm running late? When there's no time for a bowl of whole grain oatmeal to simmer on the stove, I go for vegetables. Generally, I avoid the processed stuff like Poptarts, doughnuts, cinnamon rolls, cold cereals. They're expensive, and they are far too sweet for my tastes in the morning. I like black, unadulterated coffee, and bitter things like arugula, kale, chives, and sourdough.
This morning: a bag of fresh uncooked spinach, a few florets of broccoli, and a flat bread.
What do you eat when it's grab-n-go?
Now, I'm lucky to be awake by 8 (which is when I'm supposed to be at work). Luckily, I've got a pretty lenient schedule, and can show up whenever I so please, as long as I get all of my required work done by the end of the day. So what changed? I was happy being awake before the sun came up; why would I alter that schedule?
Two words: second job. And it's a late night shift, two or three nights per week. And it involves a lot of running around and lifting heavy things. So after one year of that, it finally has caught up to me. I can no longer work a solid 16 hours and then be bright-eyed after a mere 5 hours of sleep.
What to eat for breakfast when I'm running late? When there's no time for a bowl of whole grain oatmeal to simmer on the stove, I go for vegetables. Generally, I avoid the processed stuff like Poptarts, doughnuts, cinnamon rolls, cold cereals. They're expensive, and they are far too sweet for my tastes in the morning. I like black, unadulterated coffee, and bitter things like arugula, kale, chives, and sourdough.
This morning: a bag of fresh uncooked spinach, a few florets of broccoli, and a flat bread.
What do you eat when it's grab-n-go?
Sunday, December 2, 2012
Green out of the Gray
It will be officially winter soon. Though it has been a fairly mild winter here, it has still been cold enough to effectively kill off all signs of vegetation in my gardens. My perennials look sad; my herb garden is hibernating for the time being (but at least I can still use the thyme!); the grass is curled and brown. But...
Inside the house there is a great reprieve. My mother-in-law sent me a beautiful pot of indoor houseplants she started from her own larger plants (she's got a green thumb that I envy so). And I followed some sage advice to go ahead and grow some green onions inside.
Many readers are probably aware that you can grow green onions from the bulbs you buy at the grocery store. But for those of you who were not aware of this, here's how it works:
Step 1) Next time you're at the store, pick up one of those lil' bunches of green onions. They are hella cheap - I've seen them anywhere from $0.20 up to $0.89. For this project, I recommend the variety with the smaller bulbs (the lil white part with the roots) rather than the larger ones, simply because they take up less space and require a smaller pot.
Step 2) When you get home, cut the green tops off - leave the bulb intact plus an extra 1/2 to 1" of growth above the bulb. The overall length of the part you're saving will be about an inch to an inch and a half long.
Step 3) Make something fancy and delicious with your green onions. Chop 'em up and put them on a chili cheese dog, or on a baked potato, or in some kimchi (see previous entry!).
Step 4) Plant bulbs in soil in a pot. I recommend using soil that is designed for potted plants - don't just rush out and grab some silt from your driveway and expect this to work. The pot (or I guess I should say vessel, because you can use anything - an old yogurt container with some drainage holes in the bottom, a fibrous old egg carton, or some newspaper that's been rolled up into a pot work too!) doesn't need to be much deeper than the height of your onion bulb chunk. An extra inch or two will be more than sufficient. Give each bulb some space so that they aren't overcrowded.

Step 5) Periodically water the bulbs.
Step 6) Cut off onion greens as needed for your culinary desires.
I love that it adds some greenery to the house in such a drab season; it also helps ward off the occasional stray fruit fly, and it means that I'll always have some fresh onion on hand!
Inside the house there is a great reprieve. My mother-in-law sent me a beautiful pot of indoor houseplants she started from her own larger plants (she's got a green thumb that I envy so). And I followed some sage advice to go ahead and grow some green onions inside.
Many readers are probably aware that you can grow green onions from the bulbs you buy at the grocery store. But for those of you who were not aware of this, here's how it works:
Step 1) Next time you're at the store, pick up one of those lil' bunches of green onions. They are hella cheap - I've seen them anywhere from $0.20 up to $0.89. For this project, I recommend the variety with the smaller bulbs (the lil white part with the roots) rather than the larger ones, simply because they take up less space and require a smaller pot.
Step 2) When you get home, cut the green tops off - leave the bulb intact plus an extra 1/2 to 1" of growth above the bulb. The overall length of the part you're saving will be about an inch to an inch and a half long.
Step 3) Make something fancy and delicious with your green onions. Chop 'em up and put them on a chili cheese dog, or on a baked potato, or in some kimchi (see previous entry!).
Step 4) Plant bulbs in soil in a pot. I recommend using soil that is designed for potted plants - don't just rush out and grab some silt from your driveway and expect this to work. The pot (or I guess I should say vessel, because you can use anything - an old yogurt container with some drainage holes in the bottom, a fibrous old egg carton, or some newspaper that's been rolled up into a pot work too!) doesn't need to be much deeper than the height of your onion bulb chunk. An extra inch or two will be more than sufficient. Give each bulb some space so that they aren't overcrowded.

Step 5) Periodically water the bulbs.
Step 6) Cut off onion greens as needed for your culinary desires.
I love that it adds some greenery to the house in such a drab season; it also helps ward off the occasional stray fruit fly, and it means that I'll always have some fresh onion on hand!
What's In the Fridge

These items are two of my favorite things to keep in the refrigerator these days. First is the concoction in the jar on the right. It's a simplistic mix of slices lemons and honey that have been stored in the jar for several days to "brew". Once the lemons release their juice into the honey, the delightful syrup can be added to a mug, and then I pour boiling water over it and allow it to steep for five or more minutes. It is the perfect soothing beverage for cold winter mornings! And, if you're feeling adventurous, you can add any combination of fresh ginger, whole cinnamon sticks, clove, or anything else that suits your fancy.
Delightful!
The second jar is a quick kimchi (not the authentic Korean "bury it in the ground" kind). I found the recipe in (you probably guessed it) Nourishing Traditions. It is a Korean sauerkraut. Basically, you shred up some carrots and ginger, add sliced green onion, minced garlic cloves, crushed red peppers, and chopped green or red cabbage. Pound the whole batch of vegetables relentlessly on your counter (I use a meat hammer and really take out some frustration!) to get them to release their natural juices. Add copious amounts of salt (Brittany Gray or Celtic is recommended, for the mineral content), and mix together more. Then you stuff it into a wide mouth Mason jar and pound it down with a dowel, the handle of a spatula, or even your hand. Just keep mashing it into the container until all the juices from the vegetables rise to the top of the jar (all of the ingredients need to be fully submerged in the brine or mold will grow on them).
Then you cover the jar with a lid (but don't worry about it being super tight - the fermentation process will release gas and cause a huge pressure build-up in the jar). You can even cover it with a dishcloth or other breathable material in lieu of a lid. You leave it on your countertop at room temperature for 3 to 7 days. It takes longer if your kitchen is a colder temperature; quicker if it is warm. Periodically check to make sure that all the ingredients are still submerged in the brine - if you don't have enough brine to submerge it fully, then you can add some water as necessary (use pure water, not tap water - the chlorine can greatly hinder the fermentation process and can lead to disastrous results!).
After several days, it will start to taste and smell like vinegar (if you've done it correctly). Some people recommend using a vegetable fermenting starter culture; some people use whey (as long as it has the active bacteria in it). Some recommend avoiding the salt altogether, and simply use the culture instead.
Okay, so by now you may be thinking, "Seriously, Doody? You just leave that sit for days? And you expect me to eat that?! Will I die?" Truth is, yes there is some chance of contamination - the mixture can grow mold (which is harmless, and can simply be skimmed off of the top and thrown away or put in your compost heap). There is also a chance of the ever-dreaded botulism if your fermentation doesn't work properly.
Here's how it all works: when you add salt to the vegetables, the salt in the brine temporarily protects the jar-o-goodness from any bacteria. It prevents the bacteria from developing for a short while. That buys you enough time for the vegetables and brine to ferment. Once the fermentation process has begun, "good" bacteria (see: lacto-fermentation), form in the brine and fight off any "bad" bacteria that could try to develop in the food.
When you eat a modern jar of pickles, you're getting some cucumber slices that have been treated with vinegar to prevent them from going bad while the slices ferment and become squishy. However, you lose valuable nutrients as well as the beneficial bacteria you could have gained in a true fermentation process. The process of fermenting the kimchi makes a sort of vinegar on its own, and actually boosts the nutritional content of the vegetables. That's right - your body will actually be able to get, retain, and use more vitamins from this fermentation process than what was originally in a raw carrot or raw cabbage (which are pretty healthy to begin with).
You will determine how long you want your kimchi to ferment. The longer it sits out (up to 7 days, typically), the more vinegary it will taste. If you want it to have a stronger flavor, you let it sit out for 12 hours, and taste it again. If you taste it and it seems like it is getting too pungent for your liking, then you just put it in the fridge to stop the process.
The beauty of it is that this jar (or jars, if you make a large batch like I do) of kimchi will keep in the fridge for a really long time (we're talking like up to 6 months ish). It's used like a sauerkraut - can serve it on crackers, with bread, meat, on bratwurst, or can even mix it with other vegetables for a salad. The good bacteria in it will help your intestines (the same way yogurt does), and the brine will also help your body break down other foods better.
So can this honestly be a dangerous food to make? Yes. Like I said, if the fermentation doesn't occur properly, the conditions will be ripe for molds and bacteria like botulism to grow. But I've not had any problems with it thus far, and the deliciousness makes this a risk I'm willing to take!
Feel free to peruse the internets for more information on the fermentation process and for more fermenting recipes! If you find something amazing, you can most certainly post it in the comments section below - I'd be glad to check it out!
Thanks for reading!
Thursday, November 29, 2012
New subject.
Since the last several entries have been food-related, I wanted to mix it up a bit. So this entry is about...
COMPOSTING!!!
It's messy, and stinky at times, but it is nature's way of turning the dead, unused, or rotten plantforms back into beneficial components. Here's what my year-round compost heap looks like:

The big trash bag next to it was one of six bags of leaves I'd gotten from neighbors. I am actually in the process of making a second cage next to the first one to put all of those leaves in. Often times, overly finicky gardeners will spend hundreds and hundreds of dollars on composting equipment.
Unnecessary.
Mine's working fine (although it is a tiny bit more work than the bins with a handle that you just turn to aerate it all) and it was cheap to make ($4.00 per bin). It will take a bit longer for the waste to transform into compost than some rigs, but again... $4.00 < $350.00.
Step 1: Buy, salvage, or borrow something to make the cage out of. I bought bug screen that was designed to keep critters out of people's radiators on cars. You can use hog panels, chicken wire, or any other wide range of materials. The stouter, the better. But it also helps that it is made of something that can breathe. If you decide to use something like an old trash can or a 55 gallon drum, I highly recommend that you drill many holes in the sides of it so that the necessary air can circulate through your composting materials.
Step 2: Find a place for it. You'll want it far away from your house and garage. It has a tendency to attract bugs (there are natural remedies for that too), and can get smelly if you don't have a good ratio of green to brown, and the right amount of moisture.
Step 3: Build it! Simple enough, right?
Step 4: Load it up. Fill it with table scraps (but keep anything fatty or sugary out of the bin - those things don't break down well, they'll make the heap even smellier, and it will attract more bugs and animals to your yard). The stems from broccoli, moldy old bread, grass clippings, untreated wood (like twigs that fell off a tree into your yard), dead flowers, leaves, old newspaper (preferably those that have been printed with only black and white ink, and with ink that doesn't contain lead), coffee grounds.... there's TONS of stuff that can go out to the heap that would otherwise end up in a landfill.
Step 5 (this is the part where the work comes in): About once per week (or up to once per month if you're feeling lazy), go out, disassemble your rig, and use a hay fork to turn your pile up. Just kinda stir it around. Once it's all mixed up again, reassemble the ring and fill 'er back up again.
Step 6: If you live in an area that receives little moisture, you'll need to add some water to the heap every so often to keep it moist and working. But don't overdo it. If it gets too wet, the pile will get a really pungent strong odor to it. If it gets too dry or if you don't turn it often enough, the insides of the pile will grow a white powdery mold. If this happens, your pile won't decompose properly (or at all, for that matter).
By using this method, in 6 to 12 months, you'll have good, happy compost to work with. There will be nutrient rich, dark colored matter in the middle of your pile (and throughout it) which you can then use to fertilize your plants and lawn. And those three bananas that you forgot about on your counter for two weeks didn't actually go to waste afterall!
COMPOSTING!!!
It's messy, and stinky at times, but it is nature's way of turning the dead, unused, or rotten plantforms back into beneficial components. Here's what my year-round compost heap looks like:

The big trash bag next to it was one of six bags of leaves I'd gotten from neighbors. I am actually in the process of making a second cage next to the first one to put all of those leaves in. Often times, overly finicky gardeners will spend hundreds and hundreds of dollars on composting equipment.
Unnecessary.
Mine's working fine (although it is a tiny bit more work than the bins with a handle that you just turn to aerate it all) and it was cheap to make ($4.00 per bin). It will take a bit longer for the waste to transform into compost than some rigs, but again... $4.00 < $350.00.
Step 1: Buy, salvage, or borrow something to make the cage out of. I bought bug screen that was designed to keep critters out of people's radiators on cars. You can use hog panels, chicken wire, or any other wide range of materials. The stouter, the better. But it also helps that it is made of something that can breathe. If you decide to use something like an old trash can or a 55 gallon drum, I highly recommend that you drill many holes in the sides of it so that the necessary air can circulate through your composting materials.
Step 2: Find a place for it. You'll want it far away from your house and garage. It has a tendency to attract bugs (there are natural remedies for that too), and can get smelly if you don't have a good ratio of green to brown, and the right amount of moisture.
Step 3: Build it! Simple enough, right?
Step 4: Load it up. Fill it with table scraps (but keep anything fatty or sugary out of the bin - those things don't break down well, they'll make the heap even smellier, and it will attract more bugs and animals to your yard). The stems from broccoli, moldy old bread, grass clippings, untreated wood (like twigs that fell off a tree into your yard), dead flowers, leaves, old newspaper (preferably those that have been printed with only black and white ink, and with ink that doesn't contain lead), coffee grounds.... there's TONS of stuff that can go out to the heap that would otherwise end up in a landfill.
Step 5 (this is the part where the work comes in): About once per week (or up to once per month if you're feeling lazy), go out, disassemble your rig, and use a hay fork to turn your pile up. Just kinda stir it around. Once it's all mixed up again, reassemble the ring and fill 'er back up again.
Step 6: If you live in an area that receives little moisture, you'll need to add some water to the heap every so often to keep it moist and working. But don't overdo it. If it gets too wet, the pile will get a really pungent strong odor to it. If it gets too dry or if you don't turn it often enough, the insides of the pile will grow a white powdery mold. If this happens, your pile won't decompose properly (or at all, for that matter).
By using this method, in 6 to 12 months, you'll have good, happy compost to work with. There will be nutrient rich, dark colored matter in the middle of your pile (and throughout it) which you can then use to fertilize your plants and lawn. And those three bananas that you forgot about on your counter for two weeks didn't actually go to waste afterall!
Wednesday, November 28, 2012
Using Starter to Make Flatbreads
Needing a cheap meal? Great snack? Something that makes you feel like a hippy? Look no further!
I had homemade hummus just a-lyin' around, and desired something amazing on which to devour it. And there was that overabundance of sourdough starter lurking on my kitchen counter, so it just made sense...

So I took an estimated two cups of my starter, and mixed that with some flour and water. How much flour and water? I don't know! I don't have all of the answers!
But you basically follow the recipe in the previous post about making a loaf of bread from your starter. You add approximately 2 to 4 cups of flour (wheat, white, whatever), some salt (1/2 to 3/4 tsp ish) and 1/2 to 1-1/2 cups of purified water to a bowl with your starter and hand mix (or if you're really special, you may opt to use the lil bread dough attachment on your fancy schmancy mixing machine, you lucky asshole). So once it's all blended, check your consistency. If the dough is still soggy acting (when you form a ball with it and place it in a bowl, does it immediately start to sag or "melt" down in the bowl?), add more flour to make it a bit more solid. If the dough is too dry (is there still some dry flour in the bowl that you can't get to incorporate? is the outside of the ball dry and floury looking?), add a bit more water and mix it some more.
Sit it in the bowl in a warmish place. Cover it. Let it sit for 12 hours. Leave it alone. Don't poke at it. Don't cradle it in your arms while you dance to 80's music (tempting, I know).

When that is done, and you've had enough of Twisted Sister, Quiet Riot, and covers of "Footloose", grab your big ball -o- dough and divide it into 5 to 8 chunks (depending on how large or small you want your lil flat breads to be, and what the dough will allow you to do). Get a rolling pin and a clean, flat surface, and roll it out until it's as thick as your Hooked on Phonics workbook. Rude! Okay, but it needs to be between 1/2" to 3/4" thick. Too much thinner and it gets crispy and too chewy. Too much thicker and you've lost that whole "flat bread" effect.
So, see that photo above? It tasted great, but it was a failure. Do what I say, not what I do. See, my dough was too watery when I attempted this first round of bread. So when I rolled it out and tried to put it on my preheated baking stone, it was sticky and stretchy, which made it a horrible mess. I was in a hurry, so I just folded it over on itself, and over-floured the holy living shit out of my baking stone to keep the lil lump from sticking. The outcome? It was too thick, so it is a bit dense, has an odd flavor in the middle, is over cooked at the edges, and has a powdery, unappealing dusting of raw flour on the outside.
But, you can kinda see what we're going for here. I kept mine in a Ziploc bag with a paper towel (to absorb extra moisture), and I just nuked 'em in the microwave for 20 sec before consuming them (this made it warm and soft and oh so delicious). I dipped mine in hummus, tried it with Kimchi, and melted butter over it. There are many, many different ways to enjoy your flat bread. Get creative. Ooh, and they freeze well too, so you can stash some extras back for later.
I had homemade hummus just a-lyin' around, and desired something amazing on which to devour it. And there was that overabundance of sourdough starter lurking on my kitchen counter, so it just made sense...

So I took an estimated two cups of my starter, and mixed that with some flour and water. How much flour and water? I don't know! I don't have all of the answers!
But you basically follow the recipe in the previous post about making a loaf of bread from your starter. You add approximately 2 to 4 cups of flour (wheat, white, whatever), some salt (1/2 to 3/4 tsp ish) and 1/2 to 1-1/2 cups of purified water to a bowl with your starter and hand mix (or if you're really special, you may opt to use the lil bread dough attachment on your fancy schmancy mixing machine, you lucky asshole). So once it's all blended, check your consistency. If the dough is still soggy acting (when you form a ball with it and place it in a bowl, does it immediately start to sag or "melt" down in the bowl?), add more flour to make it a bit more solid. If the dough is too dry (is there still some dry flour in the bowl that you can't get to incorporate? is the outside of the ball dry and floury looking?), add a bit more water and mix it some more.
Sit it in the bowl in a warmish place. Cover it. Let it sit for 12 hours. Leave it alone. Don't poke at it. Don't cradle it in your arms while you dance to 80's music (tempting, I know).
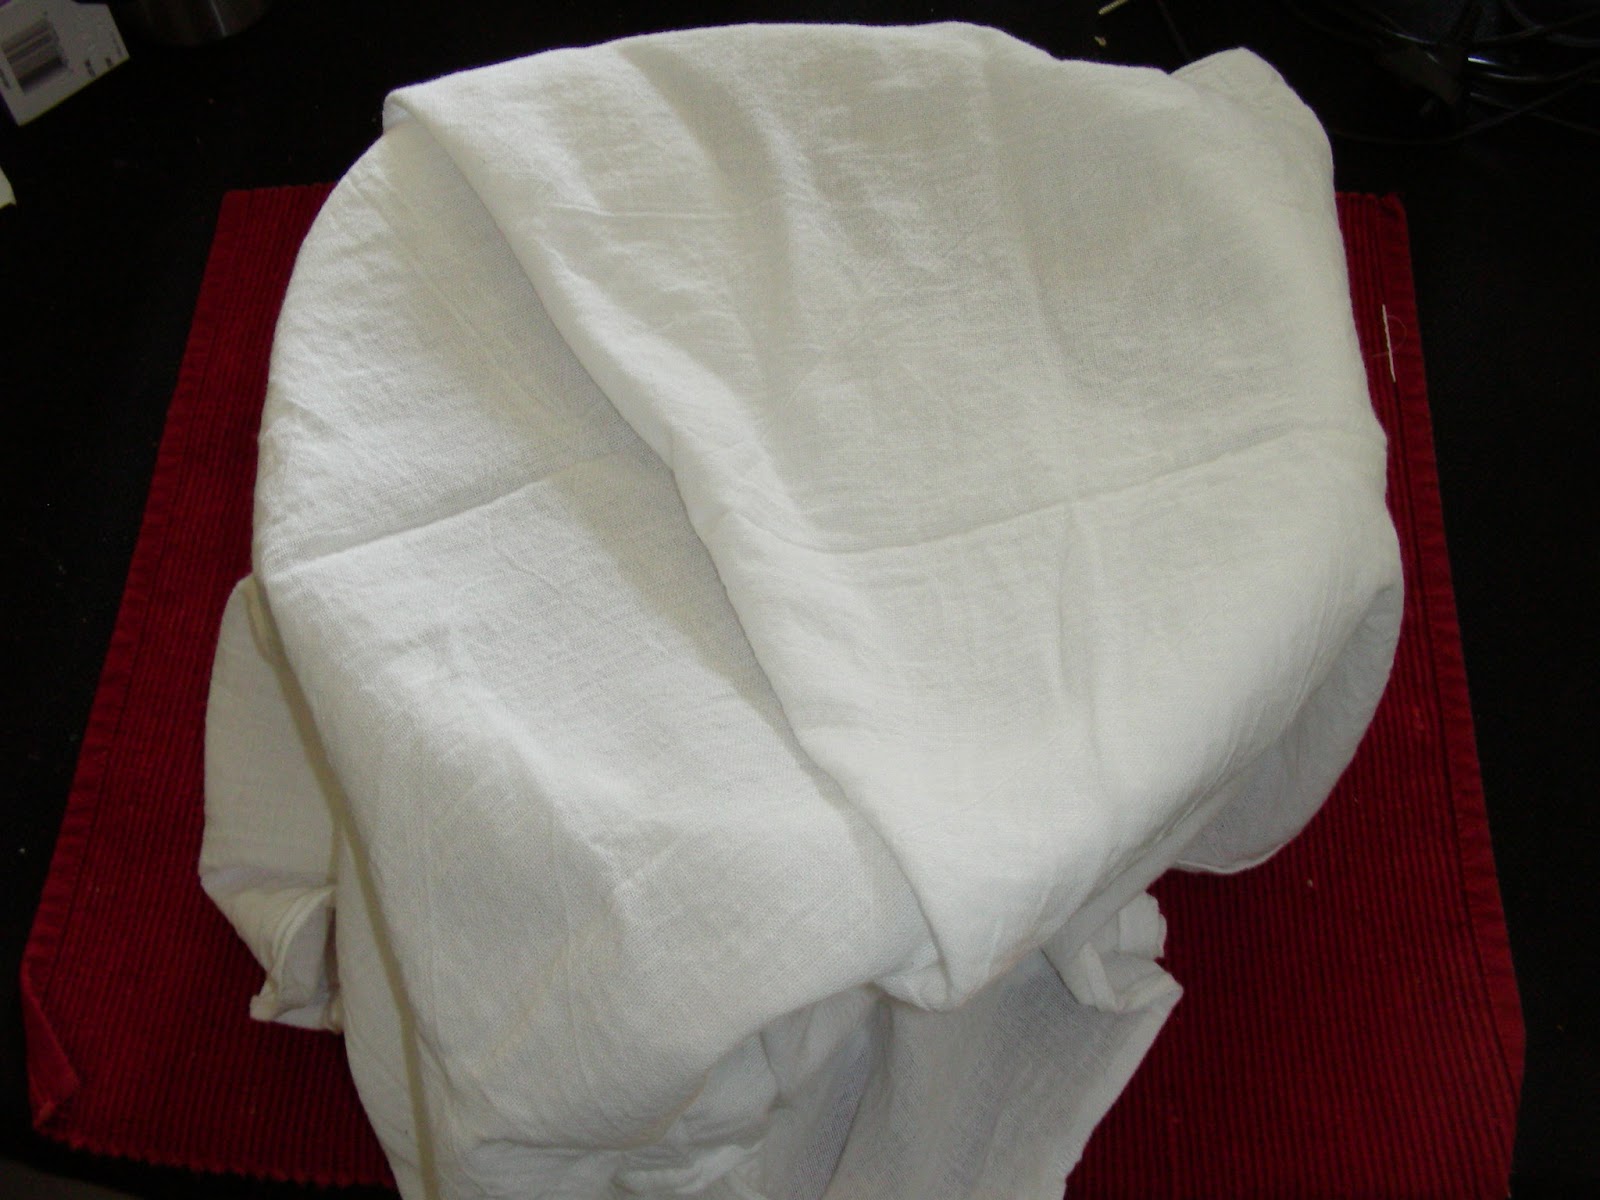
When that is done, and you've had enough of Twisted Sister, Quiet Riot, and covers of "Footloose", grab your big ball -o- dough and divide it into 5 to 8 chunks (depending on how large or small you want your lil flat breads to be, and what the dough will allow you to do). Get a rolling pin and a clean, flat surface, and roll it out until it's as thick as your Hooked on Phonics workbook. Rude! Okay, but it needs to be between 1/2" to 3/4" thick. Too much thinner and it gets crispy and too chewy. Too much thicker and you've lost that whole "flat bread" effect.
 |
| don't. do. this. |
But, you can kinda see what we're going for here. I kept mine in a Ziploc bag with a paper towel (to absorb extra moisture), and I just nuked 'em in the microwave for 20 sec before consuming them (this made it warm and soft and oh so delicious). I dipped mine in hummus, tried it with Kimchi, and melted butter over it. There are many, many different ways to enjoy your flat bread. Get creative. Ooh, and they freeze well too, so you can stash some extras back for later.
Subscribe to:
Posts (Atom)